Set up a Salesforce integration
Learn how to integrate with Salesforce to deliver visitor activity data from Uberflip into Salesforce.
Before you begin
- To set up a Salesforce integration, you need to be in the Account Admin, Content Manager or Demand Generation user group(s).
- You will need a Salesforce account that has the appropriate permissions to set up external integrations.
- We recommend that you create a new Salesforce account specifically for the Uberflip integration with login credentials known to multiple people on your team (for troubleshooting purposes).
- If possible, we also recommend using the same Salesforce account that you have used to integrate Salesforce with your Marketing Automation Platform (MAP).
- Your Uberflip account must already be integrated with one of the following Marketing Automation Platforms (MAPs): Marketo, HubSpot, Oracle Eloqua, or Pardot.
- Additionally, you will need to know which account you used to integrate your MAP with Uberflip, and must also have administrator access to that account.
About the Salesforce integration
When you integrate your Marketing Automation Platform (MAP) with Uberflip, you can capture data about the way your visitors are interacting with the content in your Uberflip Hub. This data can be incredibly useful to your sales reps, because a lead who is consuming your content is engaged, and is more likely to move further into the sales funnel.
The problem: this data lives in your MAP, but your sales reps don't. To get the most out of it, you need to get the data into the hands of your sales reps by delivering it to a platform that they use in their day-to-day — Salesforce. Uberflip's Salesforce integration makes this possible.
Plus, Salesforce is often the source of truth for revenue in an organization: as a marketer, bringing your Uberflip data into Salesforce can help you to demonstrate the revenue impact of your content experiences.
What does the integration do?
With all of Uberflip's MAP integrations, you have the option of using custom fields to send data to your MAP about visitor activity in your Hub. When this option is enabled, this data is recorded on the lead profiles of "known visitors" (visitors to your Hub who have submitted a Form CTA, linking them to a specific lead profile) in your MAP.
Uberflip's Salesforce integration takes the same visitor activity data and also sends it to the corresponding Lead or Contact profiles in your Salesforce account. This data is recorded in Salesforce as Activities, which has several benefits:
- Acitivities are highly visible in both Salesforce Classic and Lighting Experience. They appear:
- On Lead, Contact, and Account profiles in Salesforce, and remain in place when a Lead is converted to a Contact
- On Opportunities, as Activities are brought in from Contacts on the associated Account
- It's easy to generate reports on Activities, with many out-of-the-box reports available in Salesforce
- Setup is very simple, and does not require creating a new custom object (which is typically outside of the Marketing department's control, and difficult or time-consuming to set up)
How does it work?
If you sync your MAP and Salesforce lead databases, any visitor to your Hub who has a lead profile in your MAP will also have a corresponding profile in your Salesforce account. As a result, Uberflip's Salesforce integration is also able to feed the same visitor activity data it records in your MAP to the corresponding Salesforce profile.
To do this, the integration first locates the lead profile in your MAP (using the MAP's tracking script/cookie), then uses information from this profile to look up the corresponding Salesforce Lead or Contact profile. If it is able to find a Salesforce profile, the integration then writes a new Activity to that profile, containing details about the lead's activity in your Hub. You can even set default SFDC Priority and Status values for each type of Activity in order to tie them into your sales workflows.
Note
The integration will only create Activities in existing Salesforce Lead and Contact profiles. It will not create new Lead or Contact profiles if they do not already exist in your Salesforce account.
What types of data does it record?
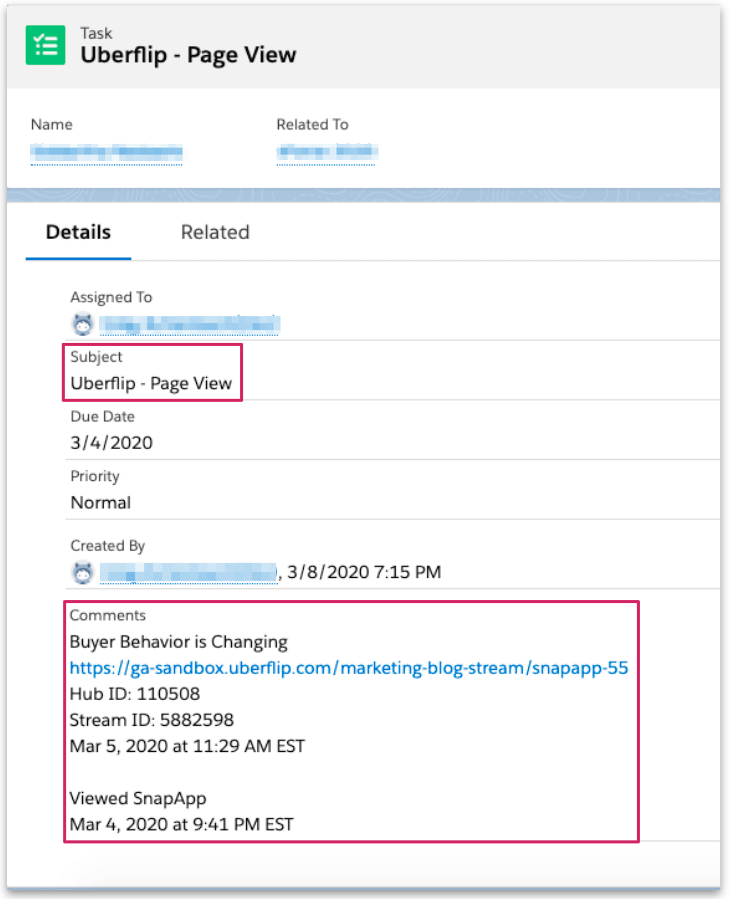
There are three types of Activity that the integration can create in Salesforce:
- Page View: Created whenever a lead views an Item page in your Hub
- CTA Submit: Created whenever a lead submits a Form CTA connected to your Hub
- Flipbook View: Created whenever a lead views a Flipbook in your Hub
Each Activity has an identifying subject, and contains custom fields that capture specific details about the lead's activity:
| Activity Subject | Activity Custom Fields |
| Uberflip - Page View |
|
| Uberflip - CTA Submit |
|
| Uberflip - Flipbook View |
|
Note
If you prefer, you can also configure the integration to write all of these details to the Comments field as a single text block, rather than to individual custom fields.
Prerequisite: Sync lead profiles between your MAP and Salesforce
Before you can use the integration, you must ensure that lead profiles in your MAP contain the person's Salesforce Contact ID or Lead ID.
This is necessary because Salesforce does not have a tracking script or cookie that Uberflip can use to find their Salesforce Lead or Contact profile. Instead, Uberflip leverages your MAP's tracking functionality to look up the visitor's lead profile in the MAP, then looks for their Salesforce Contact ID or Lead ID in that profile to find the appropriate Salesforce profile.
In order for this to work, Salesforce Lead IDs and/or Contact IDs must therefore appear on lead profiles in your MAP. While you can add them manually, an easier option is to automatically sync lead profiles between your MAP and your Salesforce account. This functionality is supported in all of the MAPs that Uberflip integrates with.
You can learn more about how to sync lead profiles between your MAP and Salesforce in the following articles:
Marketo
HubSpot
Oracle Eloqua
Pardot
Step 1: Connect your account to Salesforce
You can now begin setting up the Salesforce integration by connecting your Salesforce account to Uberflip.
Choosing a Salesforce Account
To complete this process, you will need to log in to a Salesforce account, and this account will be used to authorize and manage the connection between Salesforce and Uberflip. We strongly suggest that you do not use an account associated with a specific individual. If you do, your Uberflip integration can stop working if that user leaves your company, or their Salesforce account is deactivated.
- Log in to your Uberflip account and select any Hub.
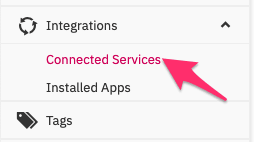
- In the sidebar menu on the left, click on Integrations, then click on Connected Services:
- On the right, you'll see a list of services that Uberflip can integrate with. Find Salesforce in the list, then click on its Connect button on the right (under the Action column) to set up the integration:

- The Connect with Salesforce pop-up will appear. Here, click the Connect button.
- If you're not currently logged in to Salesforce, the Salesforce login screen will open in a new browser window. Log in to the Salesforce account that you are using to set up the integration.
- If you're already logged in to Salesforce with the correct account, skip this step.
- If you're already logged in to Salesforce, but with a different account than the one you want to use to set up the integration, log out first, then log in with the correct account.
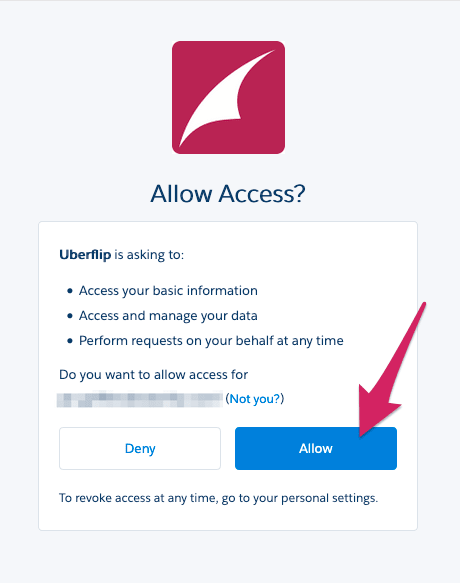
- After you log in to Salesforce successfully, the Allow Access? prompt will appear. Here, click on the Allow button to give the integration permission to access your Salesforce account:
- You should be returned to the to the Integrations page, where you'll now see connected next to Salesforce in the list, as well as two new buttons where the Connect button previously appeared:

- Salesforce is now connected to your account. Before the integration will start working, you will first need to configure it, which is covered in the next step.
Step 2: Configure Salesforce integration settings
After you have connected your Salesforce and Uberflip accounts, the integration will not yet be functional. Before it can begin sending visitor activity to Salesforce, you first need to configure its settings.
To configure the integration's settings, navigate to Integrations > Connected Services and find Salesforce in the list. Beside it, click on the Edit button:

This will open the integration's settings:
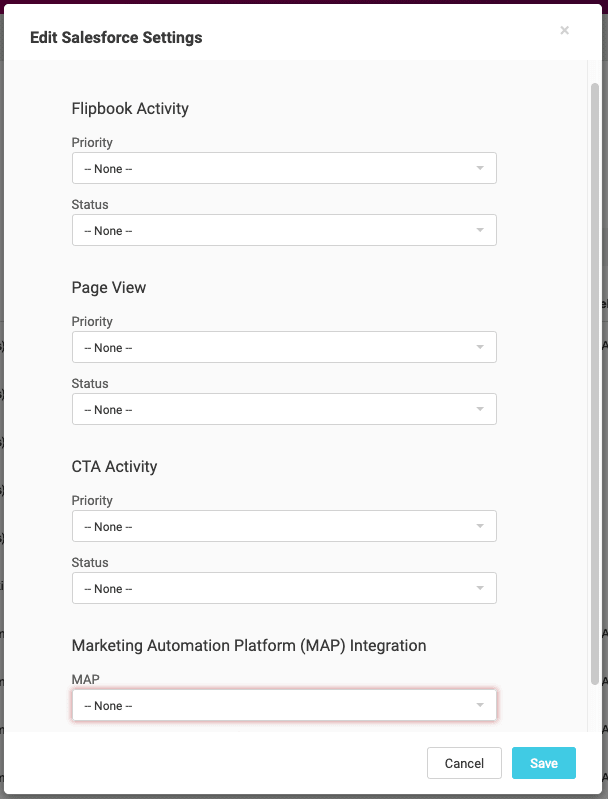
You can configure the following settings:
Flipbook Activity
Optional This setting allows you to determine which Priority and Status values will be assigned to SFDC Activities with the subject Uberflip - Flipbook. Use the dropdown menus to choose the desired values:
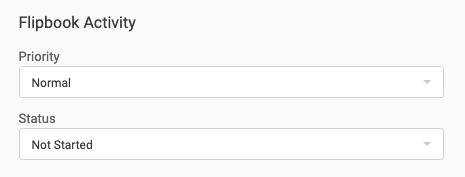
If you leave these dropdowns set to -- None -- (i.e. if you do not change them), these fields will be set using the default values you have configured in your Salesforce settings.
Page View
Optional This setting allows you to determine which Priority and Status values will be assigned to SFDC Activities with the subject Uberflip - Page View. Use the dropdown menus to choose the desired values.
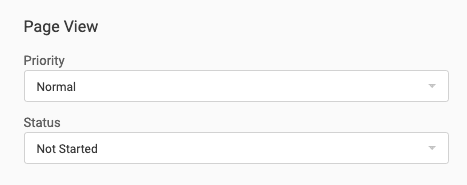
If you leave these dropdowns set to -- None -- (i.e. if you do not change them), these fields will be set using the default values you have configured in your Salesforce settings.
CTA Activity
Optional This setting allows you to determine which Priority and Status values will be assigned to SFDC Activities with the subject Uberflip - CTA. Use the dropdown menus to choose the desired values.
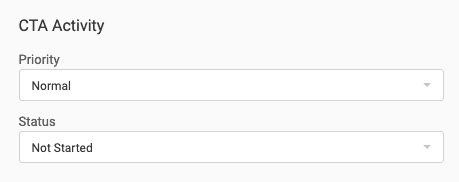
If you leave these dropdowns set to -- None -- (i.e. if you do not change them), these fields will be set using the default values you have configured in your Salesforce settings.
Marketing Automation Platform (MAP) Integration
Required Use the MAP dropdown to specify which connected MAP you want to use to look up lead profiles:
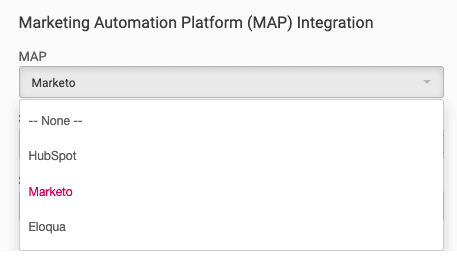
After you make a selection, two further dropdowns will appear: SFDC Contact ID Field and SFDC Lead ID Field. Use these dropdowns to choose the field(s) in your MAP where Salesforce Contact IDs or Lead IDs are stored:

Note
You only need to specify one of these fields (Contact ID or Lead ID) for the integration to work.
Uberflip Activity
Optional This setting is turned on by default, which means that the integration will create a set of custom fields in Salesforce, and record Uberflip activity data in those fields:
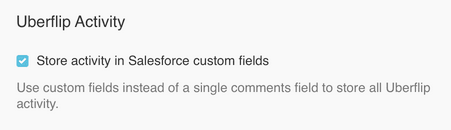
This is beneficial for reporting, as it makes it easier to report on the specific data points recorded in each custom field.
If you prefer not to use custom fields, you can uncheck this field. In this case, the integration will record the same data in the Comments field instead, as a single block of text:
Important
If you change this setting, any data that was previously recorded in custom fields will remain there, and will not be transferred to the Comments field (and vice-versa).
When you have finished configuring these settings, click the Save button to save your changes and close the settings window.
Next steps: Set up reports
The Salesforce integration should now be up and running, and you should see the new Uberflip Activities start to appear in Salesforce.
To get the most out of this integration, we recommend setting up reports in Salesforce that leverage the data it captures. These reports can help you to demonstrate how your content experiences are impacting the sales cycle.
To get you started, here's how to set up a basic report for all Uberflip activities:
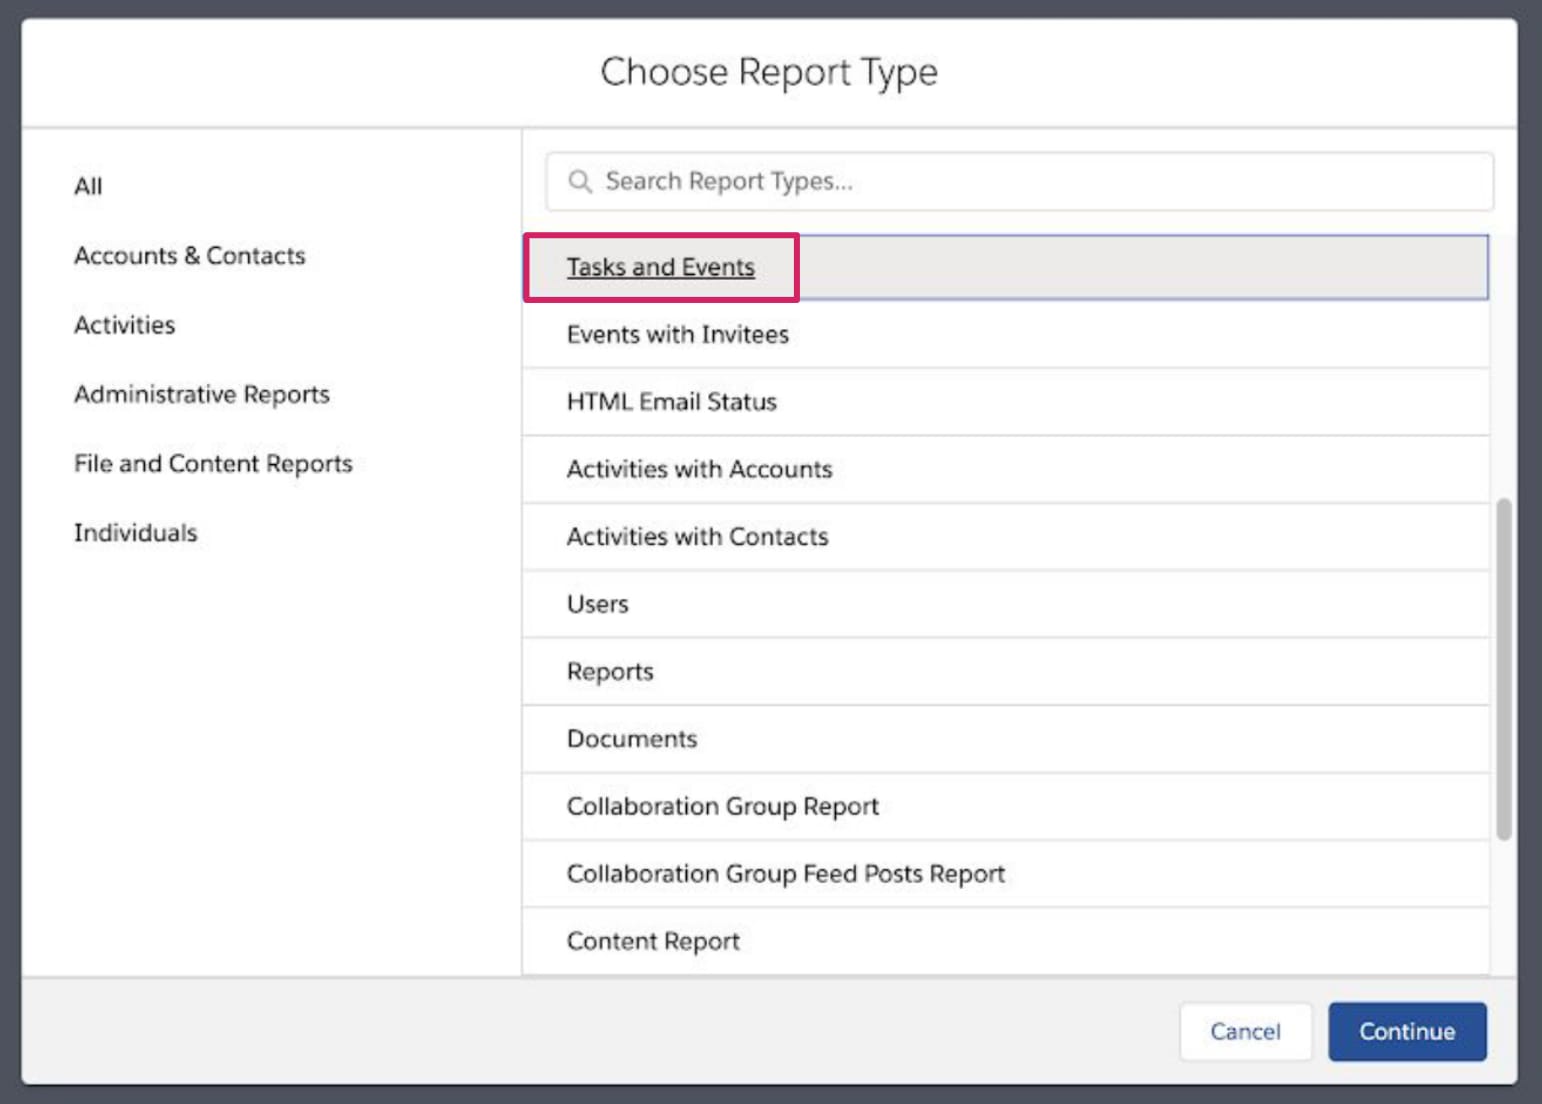
- Log in to Salesforce and create a new report.
- Under Choose Report Type, select Tasks and Events:
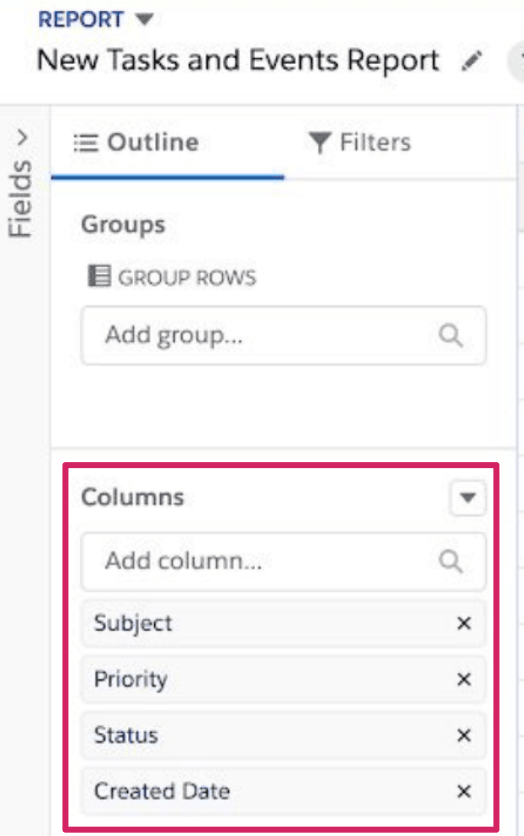
- In the Outline tab in the left sidebar, add these columns to the report:
- Subject
- Priority
- Status
- Created Date
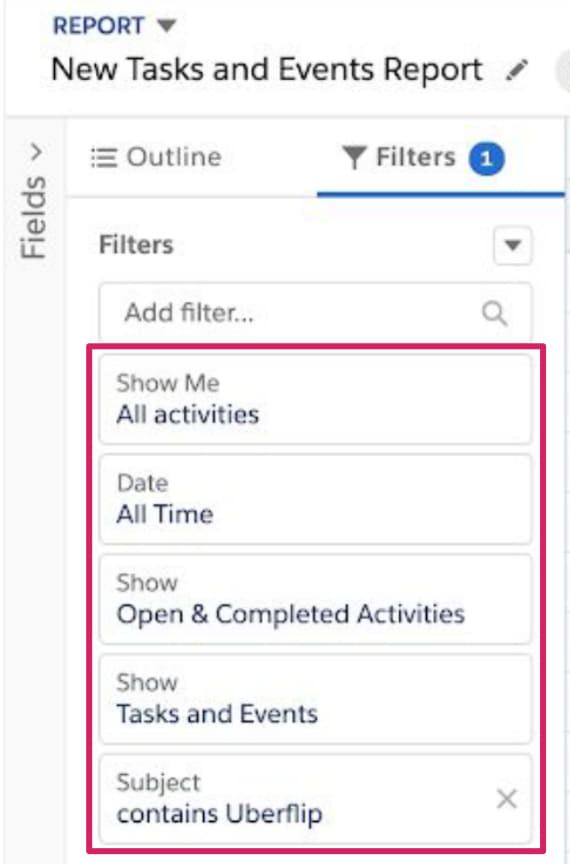
- In the Filters tab in the left sidebar, add these filters:
- Show Me: All activities
- Date: All Time
- Show: Open & Completed Activities
- Show: Tasks and Events
- Subject: contains Uberflip
- Finally, click on Save & Run to finish your report.
Starting from this basic template, you can edit the report (or create a new report) to customize it to the specific needs of your business.