Set up a Pardot integration
Learn how to integrate your Pardot account to feed leads and other useful data from your Uberflip Hubs to Pardot.
Before you begin
- To set up a Pardot integration, you need to be in the Account Admin, Content Manager or Demand Generation user group(s).
- You will also need a Salesforce account with Admin permissions.
- To get the most out of the integration, you should be using Form CTAs to generate leads to send to Pardot. To learn more about Form CTAs and how to set them up, see this article.
Another way to learn 📺
Check out the Uberflip Academy for a video overview on setting up a Pardot integration.
About the Pardot integration
If you use Pardot as part of your marketing tech stack, you can integrate it with your Uberflip account to get the most out of both platforms. Within your Hubs, Form CTAs are a highly effective way to generate leads — over 7x more effective than traditional landing pages. And once you've generated those leads, you need to do something with them — which is where Marketing Automation Platforms (MAPs) like Pardot shine.
Form CTAs are designed to stream the leads they capture to a MAP, where you can make them part of your lead nurturing strategy. With Pardot specifically, you have the option of adding these leads to your main Prospect List, or to a Pardot List of your choice.
When you integrate your account with Pardot, Uberflip also automatically assigns unique IDs (using cookies) to all visitors to your Hub. This has two effects:
- If a visitor fills out a Form CTA that is connected to Pardot, the data they enter is tied to their cookie's ID. This allows us to automatically prefill that visitor's data on any other Form CTAs that they interact with.
- Even if a user has not yet filled out a Form CTA, the cookie allows them to be tracked as they engage with your Hub content. If you set up the necessary custom fields in Pardot, this allows you to track the Items that leads convert on.
In this article, we'll look at the prerequisites for integrating your account with Pardot, how to configure the integration, and optional steps to enable additional data collection.
Prerequisite: Get your Pardot login credentials
To set up a Pardot integration, you will need the following information:
- Salesforce login credentials
- The email address and password associated with the Salesforce SSO account that you want to use. See the guidelines on choosing an account to use with the integration below.
- Pardot Account ID
- A unique ID that identifies your Pardot Instance. See below for instructions on how to find it.
- Pardot Campaign ID
- A unique ID that identifies the Pardot campaign in which you want to store data from Uberflip. We recommend using a campaign created specifically for this purpose. See below for instructions on how to find it
- Pardot Business Unit ID
- A unique ID that identifies the Pardot Business Unit you want to use to store data from Uberflip. See below for instructions on how to find it.
Choose a Salesforce account
To set up the integration, you will need to choose a Salesforce SSO account that Uberflip will use to access your Pardot instance. You will need the login credentials for this account, which are simply its email address and password.
Before selecting which account you want to use for this purpose, please note the following:
- As a best practice, you should not use an account that is associated with a specific user. If you do, the integration can stop working if that user leaves your company, changes their email or password, or their account is deactivated.
- We recommend that you create a new account specifically for the Uberflip integration. This account should be tied to a generic email address (e.g. marketing@mycompany.com) that your whole team has access to. This makes it easier to fix problems with the integration should they arise.
Get your Pardot Account ID and Campaign ID
You'll also need your Pardot Account ID and Campaign ID, which can both be found in the same location in Pardot.
- Log in to your Pardot account using the account you will be using for the integration.
- In Pardot, click on Marketing > Campaigns.
- In the Current Pardot Campaigns list, click on the Campaign you want to use.
- On the next page, click on View Tracking Code in the top right.
- A text box with JavaScript code will appear at the top of the page. Here, look for piAId and piCId (they should be on the second and third line in the box):
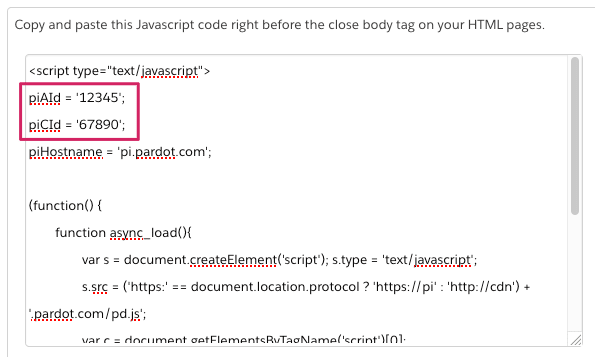
- There should be numeric values next to each one. Make a note of these values, as you will need them to set up the integration (do not include the single quotation marks):
- piAId is your Account ID
- piCId is your Campaign ID
Important
You must use the Account ID that appears in the Campaign Tracking Code.
Do not use the Account ID that appears under the Account or Account Settings menu in Pardot (i.e. as described in this article from Salesforce). This Account ID is different from the one found in the Campaign Tracking Code, and will not work for setting up this integration.
Get your Pardot Business Unit ID
Lastly, you will also need your Pardot Business Unit ID, which you can find in Salesforce.
- Log in to your Salesforce instance.
- Navigate to the Salesforce Setup Menu.
- See this article from Salesforce for instructions on how to find the Salesforce Setup Menu.
- Enter "Pardot account setup" into the Quick Find box, then click on Pardot Account Setup when it appears in the results.
- In the Pardot Account Setup section, find your Pardot Business Unit ID: it is a string of letters and digits that begins with "0Uv" and is 18 characters long.
- Make a note of your Pardot Business Unit ID, as you'll need it during the setup process.
Connect to Pardot
Now that you have the necessary login credentials, you can easily set up the integration in the Uberflip app.
- Log in to your Uberflip account and navigate to any Hub.
- Integrations are set up at the account level, and apply to all Hubs within your account.
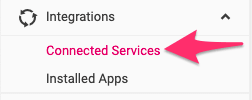
- In the sidebar menu on the left, click on Integrations, then click on Connected Services:
- On the right, you'll see a list of services that Uberflip can integrate with. Find Pardot in the list, then click on its Connect button on the right (under the Action column):

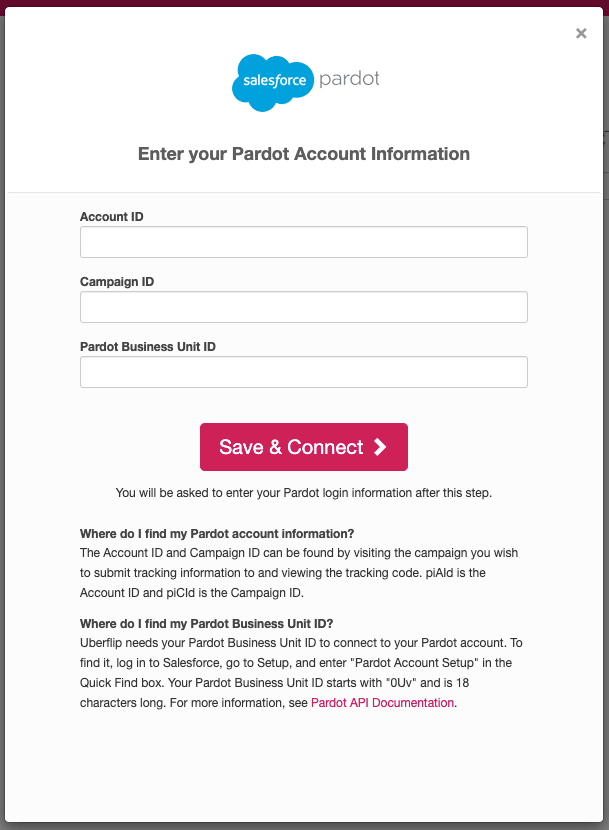
- The Enter your Pardot Account Information window will open. Enter your Pardot Account ID, Campaign ID, and Business Unit ID into the fields provided, then click on the Save & Connect button:
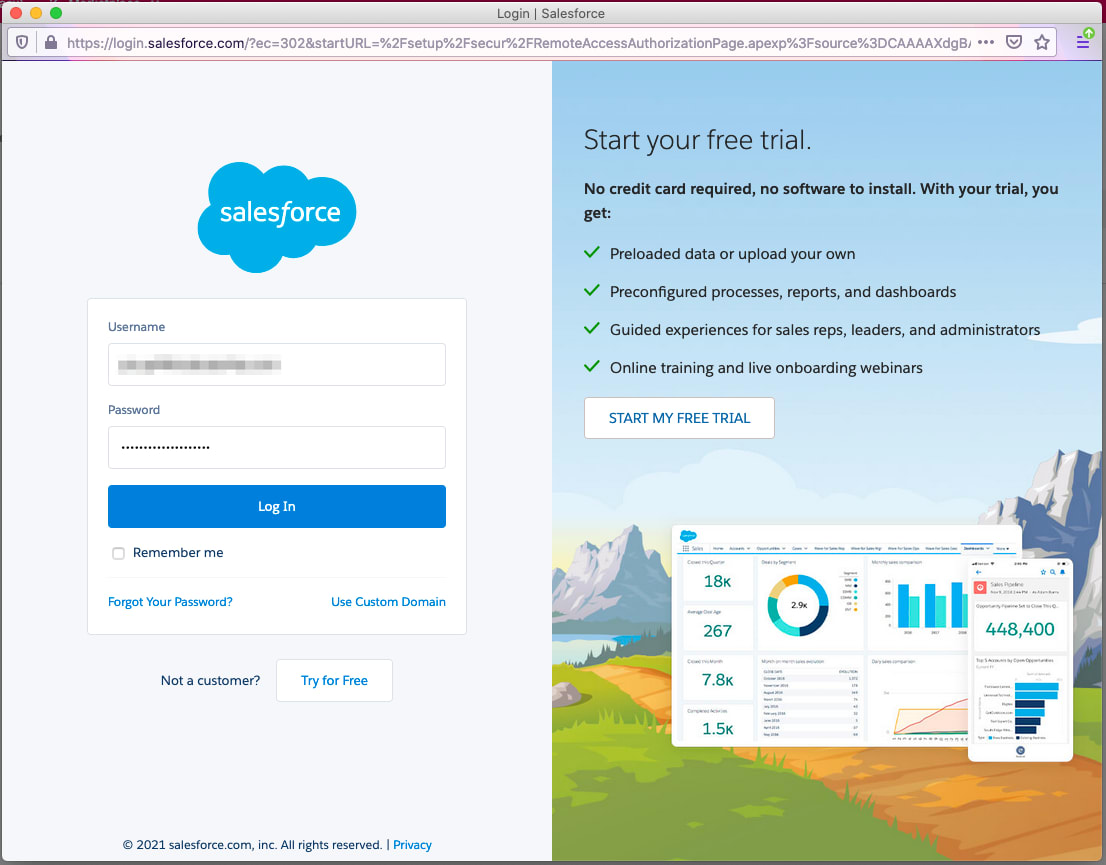
- The Salesforce login screen will appear in a new window. Enter the username and password of the Salesforce account that you chose earlier, then click on Log In:
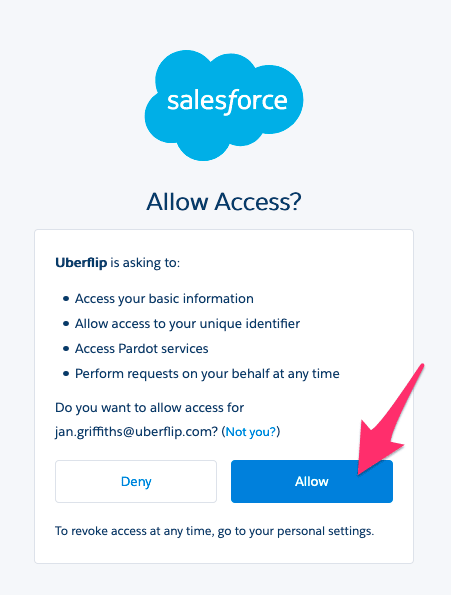
- After you log in successfully, you'll see a prompt asking if you want to allow Uberflip to access your Pardot account. To grant this permission and proceed, click on the Allow button:
- The login window will close, and you'll be returned to the Connected Services page. You you should see a banner indicating that Pardot was connected successfully, as well as the label connected next to Pardot in the list.
Your Uberflip and Pardot accounts are now connected. Next, you'll need to decide what kind of optional data you want the integration to send to Pardot.
Configure Pardot integration options
Now that you have connected Pardot to your Uberflip account, Uberflip will send lead data to Pardot anytime a visitor submits one of your Form CTAs. In addition, you can also choose to turn on options which send additional data to Pardot. This data can help you to understand how your leads are engaging with your content in Uberflip.
The options you can configure are:
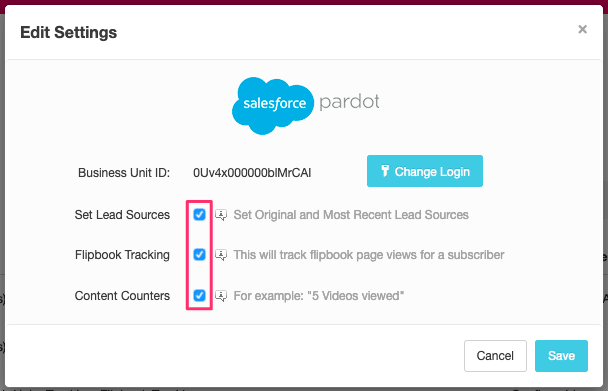
- Set Lead Sources: If enabled, Uberflip will record the specific CTA(s) a lead submitted on their profile — both the first CTA they ever submitted, and the one they submitted most recently.
- Flipbook Tracking: If enabled, Uberflip will record a lead's Flipbook page views on their profile.
- Content Counters: If enabled, Uberflip will record counts of how many times a lead has viewed different types of content (e.g. articles, videos, etc.) on their profile.
Note
Most of these options use custom fields (see below) to record the relevant data. The exception is the the Set Lead Sources option: when this is enabled, Uberflip will update Pardot's default Source field on the lead profile. This will happen only if the Source field is empty — if it already has a value, Uberflip will not change it.
These settings are disabled by default, and the integration will still work if you choose not to enable them. However, we highly recommend turning them on.
To configure these options:
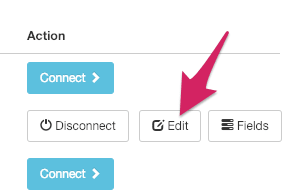
- On the Connected Services page, click on the Edit button that now appears next to Pardot in the list (under the Action column):
- The Edit Settings window will open. To enable an option, simply check the box beside it:
- Click on Save to apply your changes.
Whether or not you chose to enable any of these options, your final step is to create custom fields in Pardot to record the data Uberflip sends over.
Create custom fields in Pardot
When Uberflip sends data to Pardot that a lead has submitted using a Form CTA, this data is captured in Pardot's standard fields (name, email, etc.), which are available in Pardot by default. However, the integration will also send data for which Pardot does not have standard fields. To capture this data, you need to create custom fields in Pardot.
You can learn more about Uberflip-created custom fields and how they're used in this article:
To create custom fields:
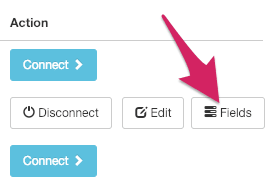
- On the Connected Services page, click on the Fields button next to Pardot (under the Action column):
- The Service Fields window will open. Inside, you'll see a list of all the custom fields that you can set up in Pardot to record the data being sent from Uberflip. By default none of these fields will exist yet — fields that still need to be created appear in red and are indicated by an x in their Status column:
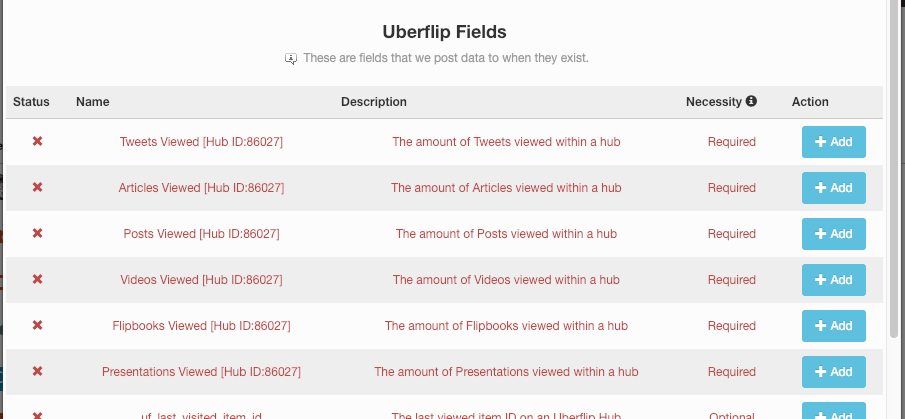
- To create a field, click on the +Add button beside it:

- Once a field has been successfully created, its line will turn grey, the +Add button will disappear, and a checkmark will appear beside it in the Status column:

- Continue clicking the +Add button for each field until you have added all the fields you want to use, then close the Service Fields window when you're finished.
Required vs. optional fields: what's the difference?
Required fields are either:
- Fields that Uberflip will try to write to, but which don't exist in Pardot by default, or
- Fields which are associated with the Set Lead Sources/Flipbook Tracking/Content Counters options. These options require custom fields, so if you enable them, you must also create the corresponding fields. Note that if you do not enable these options, their fields will not appear in the Service Fields window.
Optional fields are related to tracking the Item a lead converted on. These are optional because, if you do not create them, the corresponding data will still be sent to Pardot, but will simply not be recorded. Adding these optional fields will allow you to capture potentially valuable insights on which Items are your best performers in terms of conversions, so we strongly recommend adding them.
Next steps
Congratulations — you've successfully integrated Pardot, and your Uberflip account is now ready to start sending data to Pardot. Now that Pardot is connected, you can begin creating Pardot-connected Form CTAs to start generating leads.
Important: If you use Pardot Form Handlers
If you use Form Handlers in Pardot, you must also enable the option Never hide this CTA on any Form CTA connected to a Form Handler. This is required because Form Handlers will only submit when a Form CTA is actively submitted (bypassed Form CTAs for known leads will not submit a Form Handler).
Additionally, ensure that the "email" field is the only field marked as required in the Form Field Mappings section of the Form Handler setup.