Automatically Create Links Using Regular Expressions
How to automatically create links in a Flipbook using Regular Expressions (regex).
Before you Begin
- To use this tool, you need to be an Account Admin or Content Manager.
- This tool will not work on image-based text, so you should always use embedded fonts in your PDFs if you want to use the Auto-Link Tool.
- To use this tool, you will need to know how to write regular expressions. You can learn more about regular expressions here.
About Regular Expressions
The Auto-Link tool can automatically create hyperlinks in Flipbooks on any string of text you want (such as keywords, URLs or emails). You can create these in bulk using regular expressions, which is a powerful language for finding specific strings of text or phrases that meet criteria of your choice. For example, the regex
[cC][oO][mM][pP][aA][nN][yY][nN][aA][mM][eE]
Would find all lower and upper-case combinations of companyname, e.g. companyname, CompanyName, ComPanYnaME, etc.
You can choose to use simple regex (as above) or dynamic regex. For example, if you want to search for a product code in the format ABC-123456, a dynamic regex like
[A-Za-z][A-Za-z][A-Za-z].[0-9][0-9][0-9][0-9][0-9][0-9]
would recognize all of the codes listed in the example table below:

Create the Auto-Link Job
- Log in to your Uberflip account and click on Flipbooks in the menu bar at the top.
- Use the dropdown to select the folder with the Flipbook you want to use the Auto-Link tool on.
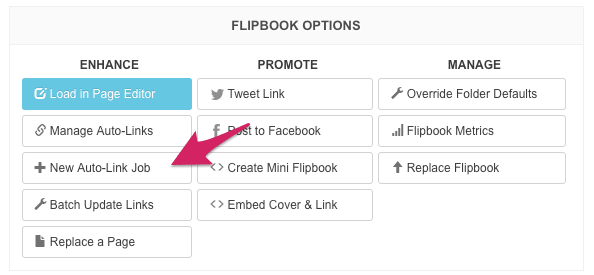
- Click on the Flipbook to see more options. Under the Flipbook Options section, click on New Auto-Link Job.
- On the next page, use the dropdown under Job Type to select Regular Expression.
- More fields will appear. Under Job Name, type in a name to help you identify the CSV job.
- Under Search for (Regular expression), type in the regex that describes the string you want to find and link.
- Under Replace With (link), use the text fields to type in the URL to link by following the tooltips.
- Under Hovertip, use the text field to type in a tooltip that will appear on hovering the mouse over the link. If left blank, the tooltip will display the linked URL.
- Click on Create Job, and you will be taken to the Manage Auto Link Jobs & Tasks page to review the job.
Manage Auto-Links
- Your CSV Job will contain a Task for each line in your CSV file, and each Task will contain one link.
- Click on a Task to see the links created by that Task. From here, you can choose to enable, disable or delete the link.
- If you want, you can also delete the entire Job from the Manage Auto Link Jobs & Tasks page.